

Heating oil tanks accumulate thick, gel-like sediment, also known as sludge, over time. Every few years, as the sludge begins to grow, you might find yourself unsure of what to do. Is it a big problem? Do you need to clean it? Is it so bad that your tank needs replacement? Don't let heating oil sludge cause you stress this winter. Be proactive by cleaning your tank or calling in a professional to take that sludge off your hands.

- What Is Heating Oil Sludge?
- How to Clean Your Heating Oil Tank
- Should I Be Concerned About Heating Oil Sludge?
- How to Prevent Tank Sludge
What Is Heating Oil Sludge?
The heating oil sludge or sediment at the bottom of your oil tank is a dark, gooey substance that builds up over time. It consists of dirt and debris, excess moisture, rust flakes from the inside of the tank, microorganisms that feed on your oil and other fuel byproducts.
Sludge usually forms when petroleum is left in storage for extended periods, especially in a mostly-empty tank. Many homeowners in the Northeast who discover sludge in their oil tanks usually find it mid-autumn or early winter — whenever it's finally time to turn up the heat. A fuel delivery technician may be the first one to notice the sediment buildup in your tank when they come for your annual fill-up.
As time passes, the leftover petroleum gets exposed to air, light, heat and other reactive elements. The catalyst event is air and moisture entering your tank and fuel supply. Air is necessary to maintain your fuel tank's pressure equilibrium, so your tank has a vent pipe that lets air in and out. When you get an oil delivery, air escapes through this pipe. As oil leaves through the fuel line, air comes in through the vent to replace it.
That outside air brings in moisture. Once it's inside the tank, it condensates as the temperature changes and forms rust. Over time, water condensation and rust drip down to the bottom of the tank. Even if this didn't contribute to sludge, the water causes problems. Pooled water can rust and corrode the tank from the inside out, creating oil leaks. It also grows microbes. Oil floats above water, and the seam where the two liquids meet provides the perfect feeding grounds for these microbes. Bacteria consuming your oil supply is what turns the petroleum into sludge.
These elements cause a chemical reaction with the oil that enlarges the molecules until they turn thick and viscous. Then, they stick to the bottom of the storage tank. Sludge is more common in particularly bitter winters or when the oil tank is low.

How to Clean Your Heating Oil Tank
Sediment in your oil tank is mostly inevitable. Most homeowners need to clean their oil tanks every three years and may be able to stretch it to five years. Those who refuel their tanks often need to clean the tank more frequently. If you've recently experienced a loose vent cap, which can let insects, air or moisture into your tank, you should also consider cleaning it soon. Your technician can give you a more specific cleaning schedule based on your typical usage.
If you want to remove sludge from the oil tank on your own, rather than working with a professional, prepare to get messy. We recommend gloves and an outfit you don't mind getting grease on. You'll also need some supplies to begin cleaning:
- Disposable containers or plastic buckets
- Cleaning rags
- An air hose
- A portable air pump
- A water hose
- Trisodium phosphate (TSP) cleaner
- Denatured alcohol
1. Drain the Oil Tank
First, you must drain all the oil and loosen the sludge from the tank. Position one of your disposable containers under the drain valve, open the cap and wait until all the oil is gone. Seal the lid and carefully move the containers out of the way so you won't accidentally spill them.
Nest, place another container under the valve. Use your hose to spray clean water into the tank. Keep spraying until the water dripping from the valve is completely clear. Move this second container out of the way and replace the valve cap.
2. Scrub the Excess Sludge
Once all the water has drained out, use your cleaning rags to wipe off any stubborn grime and sludge around the drain.
While you're at it, use the rags to lightly clean the outside of the oil tank. While the outside of the tank doesn't contribute to sediment buildup, it's always a good idea to clear off any leaves and caked-on dirt or grime. If you spot any rust on the outside, clean it off and apply some rustproof paint.
3. Add Cleaner
Now, you can let your cleaner do all the hard work. Trisodium phosphate is usually the recommended cleaner for oil tanks because it's tough on grease, dirt and soot — excellent for heavy-duty cleaning applications. TSP comes as a dry, white powder that you must mix with water.
However, you may need to use an alternative chemical. Many states have restrictions on cleaners containing phosphates, and states like New York have banned TSP outright. You might also wish to avoid TSP to protect your yard and garden plants. In that case, you may select a TSP substitute as a phosphate-free alternative to the popular degreaser. Or, look for another cleaning product marketed for oil tank cleaning. Be careful not to confuse an oil tank cleaner with an oil additive for preventing sediment buildup.
Next, you can mix your cleaner. If you're using standard TSP or a phosphate-free alternative, the ratio is 5 gallons of water to one cup TSP powder. Fill your tank with water and add the TSP after. If using another chemical, follow the directions on the container to dilute the mixture.
Once you've added the cleaner, feed your air hose into the tank and start the air pump. The air will agitate your cleaning solution and help loosen the sludge from the sides of the tank. Leave the pump on for 12 hours. When the time's up, place another plastic bucket under the drain valve, and let your cleaning solution and remaining sludge drain out. Then, spray down the inside of the tank with your hose to make sure it's all removed.
4. Dry the Tank and Refill the Oil
After spraying down your tank, you need to remove the excess water. Water is what causes sludge buildup in the first place, and it can rust out your tank from the inside. It will also compromise your fuel quality. You'll have to do a bit more than just air out the tank, and that's where the denatured alcohol comes in. Pour about 3 gallons in, and splash it around from different angles to make sure you coat all the tank's internal walls.
The alcohol does an excellent job absorbing the excess moisture from your tank. Once you've added it, reinsert your air hose and start the pump. Leave it for about an hour and until all the moisture has evaporated. Once your tank is dry, refill it with clean oil. Don't return the oil you drained from the tank because it is already contaminated with the oil-feeding bacteria that caused your sludge. Place an order with your oil provider to get a fresh supply.
5. Dispose of the Sludge Safely
Now, you're left with at least of few containers of grime, diluted TSP, contaminated oil and sludge. Technically, these bins contain hazardous waste. They can't exactly sit around in your garage, even when sealed. Contact your state's hazardous waste disposal service or environmental protection department to find out how to dispose of your oil tank sludge appropriately.

Should I Be Concerned About Heating Oil Sludge?
After learning what goes into an oil tank cleaning, you might be wondering if you really need to remove all that sediment. Is it such a big deal? On the one hand, oil tank sludge isn't necessarily a concern in and of itself. It does contain microbes, rust and other contaminants you might not want to be around. However, while it's sitting in a full tank of oil, it stays anchored on the bottom and won't enter your system. The real problem arises as your oil level depletes, which can damage your heating system.
With little oil left in the tank, the sludge is more likely to get pulled into and clog your supply line. It might also plug the oil filter, blockading some or all of your oil from entering your heating system. The clogged oil filter limits your system's efficiency, costing you more fuel than you should be using. In the worst-case scenario, your system could completely shut down and require some major repairs.
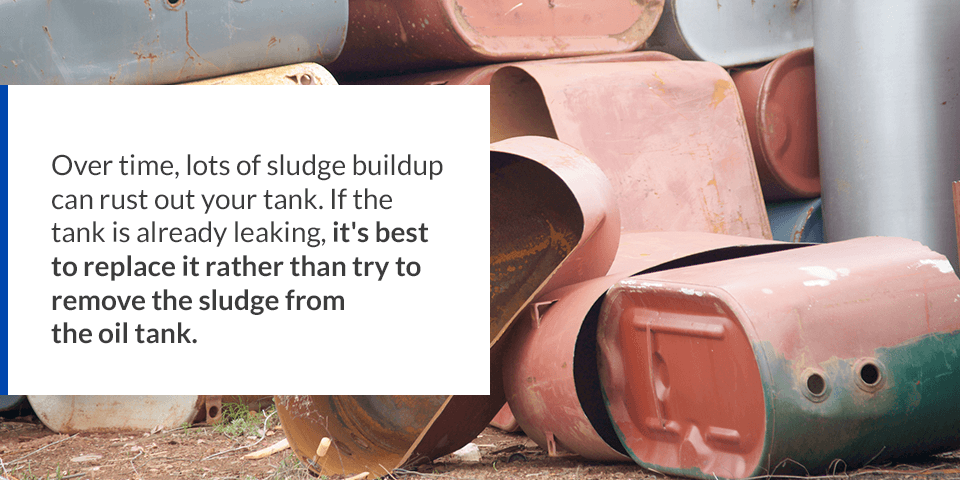
While you can mitigate most of these concerns with a thorough cleaning, an oil tank with lots of sediment may need replacement in some circumstances. Over time, lots of sludge buildup can rust out your tank. If the tank is already leaking, it's best to replace it rather than try to remove the sludge from the oil tank. If you notice a good deal of rust, it's a safe bet to replace the tank before the leaks spring. A sediment-filled tank near the end of its life span might also be better off replaced than cleaned.

How to Prevent Tank Sludge
If you're experiencing heating troubles related to oil sludge clogs, your top priority is making sure this never happens again. Luckily, once you take care of your sludge, you have many options to keep your tank clean. You may even be able to put off your next cleaning for an extra year or two. Here are some strategies to try:
1. Schedule Your Refill
The easiest way to prevent the clogs from oil tank sludge is to refill your oil tank before it reaches low fuel levels. Don't let your oil tank go until it's empty! Holding off on a refill increases the chances that the sludge will enter your fuel line. And if a small clog has already formed, a close-to-empty tank might leave you in the cold quicker than you're expecting. If possible, avoid letting your fuel level get below the halfway mark.
A fantastic way to prevent your oil from getting too low is with the Heating Oil Automatic Delivery Service from Smart Touch Energy. When you sign up, we'll keep a record of your home's heating needs, allowing us to calculate when you're due for a fill-up with impressive accuracy. You'll save an extra $0.03 on every gallon, and you won't have to schlep outside to your oil tank in the dead of winter to check your fuel levels.
2. Use a Sediment Treatment
A heating oil additive or treatment can also prevent sludge buildup. If you add it to the tank before your next delivery, it will break down the sludge at the bottom of your tank. Look for a treatment that contains a sludge dispersant, which will break up the sediment and loosen it from the bottom. Many treatments are available on the market. Some additives will also remove water, prevent algae and stop wax or gel buildup.
With a sediment emulsifier in the mix, the sludge particles become small enough to burn up with your regular fuel and pass harmlessly through your supply line and filter. Throughout one heating season, a dispersal treatment might restore your tank to a sludge-free system. The one risk is that the additive will suspend the sediment and may clog the oil filter. For that reason, it's not a good idea to use this type of additive on a near-empty tank.
3. Service Your Oil Tank Yearly
While you only need to clean your oil tank once every three to five years, it needs other annual maintenance to keep it in top condition. Work with your oil supplier to schedule yearly service. Your technician will change the oil filter and perform other work to prevent sludge and related clogs. They can also catch sludge deposits before the condition worsens.
4. Use Quality Oil and the Right Supplier
Premium quality oils are more refined and contain fewer contaminants. The better the oil you put in the tank, the slower your sludge buildup will be.
Working with a reputable supplier is also essential because they'll deliver cleaner fuel and are equipped to help you prevent sludge. The right company will have the tools and resources to handle oil waste and even pump out your sludge, so you don't have to get your hands dirty. If you trust your oil provider, you can talk through how and when to add treatments to your tank and take other preventive measures. They'll also spot issues for you during your regular maintenance and yearly fill-ups.
5. Keep Your Tank Full Through the Spring and Summer
It might seem counterintuitive to keep oil in your tank all summer. After all, when oil sits unused, it's more likely to develop into sludge. However, when the tank is full, less air and water vapor enter the container. We recommend keeping a half-full tank outside of the heating season, and if it's more than halfway full, that's even better. The humidity and shifting temperatures in the spring and summer are more likely to create condensation, so the less room it has to form, the better.
As a bonus, you'll be prepared for anything the Northeast's unpredictable weather has to throw at you. A surprise early-September cold spell is nothing to worry about when you have a full oil tank!

Trust Smart Touch Energy for All Your Heating Oil Tank Needs
At Smart Touch Energy, we're experts in all things oil. We deliver heating oil throughout the Northeast and assist with anything from Automatic Delivery to emergency fill-ups and restart services. Learn more about our heating oil solutions and our commitment to first-class service. Have more questions about cleaning your oil tank, or need more fuel? Contact us and talk to one of our technical experts or place an online order for your next oil delivery today.
