

If your home heating system runs on oil, then you rely on your oil tank to safely store and protect that oil. Unfortunately, oil tanks aren't impenetrable, so you may experience the common problem of water making its way into your tank.
- How to Tell If You Have Water in Your Tank
- How and Why Water Gets Into Your Oil Tank
- How to Remove the Water From Your Oil Tank
- Potential Damages of Not Removing the Water
- How to Prevent Water From Getting in Your Oil Tank
How to Tell If You Have Water in Your Tank
It's not always easy to tell you have water in your oil tank. Since oil rises above water, just looking into the top of your tank won't tell you much. It's especially tricky if you have an underground tank. If water in your tank goes undetected for a long time, you may begin to notice when you have issues with your heating system. To avoid these problems, take preventative measures by properly maintaining your tank and checking it periodically for water.

If you're concerned you may have a water issue, or if you're just conducting a routine check, the simplest way to test the inside of your tank for water is with a water-finding paste. This method is easy and reliable — just be sure to check the manufacturer's directions for the particular water-finding paste you use. In general, though, you simply coat the bottom of a probing stick or string in the paste and lower it to the bottom of your tank. It's important that you make sure it reaches the bottom since this is where water settles if it's present. If the paste detects water, it will turn a color, such as yellow or red. The color can also indicate the amount of water detected. If you find a large quantity of water, you should contact a professional technician right away.
How and Why Water Gets Into Your Oil Tank
Oil tanks are designed to keep water out, so you may be wondering how this problem arises in the first place. The reality is that water is a natural part of our atmosphere, and oil tanks are not completely impervious to water. The water found in oil tanks is likely from one of two sources — rainwater or condensation. Understanding which of these is the source of your tank's water problem is helpful for future prevention.
- Rainwater: Outdoor tanks are more exposed to the elements and can, therefore, be more vulnerable to water. If a lid or filler cap isn't closed all the way, rainwater can easily enter the tank. Most above-ground tanks are placed close to the house where gutters can also be an issue. Overflow from gutters can get into any openings in your tank. Even if you are careful to make sure your tank is properly closed off, you could still have an issue due to the condition of the tank itself. For instance, age or lack of maintenance can cause your tank's seals to become impaired, its vents to be damaged or the body of your tank to be compromised by rust or cracks. Any of these issues can allow water to get inside the tank.

- Condensation: Indoor and outdoor tanks alike are prone to experiencing condensation. Condensation can occur whenever a partially-filled tank's air vents let in moist air. When the tank's interior temperature is cooler than the surrounding exterior temperature, the moist air cools down inside the tank, causing the water vapor in the air to become water droplets. These water droplets then cling to the interior walls of the tank and eventually settle at the bottom of the tank. A few water droplets don't pose a large problem, but condensation can accumulate significantly over time.
It's also worth noting that, if you have an underground oil tank, groundwater can seep in through perforations. If water is getting in this way, it may also mean that oil is seeping out, which is a serious issue. If your underground tank is damaged in any way, you should seek professional help to fix or replace it
How to Remove the Water From Your Oil Tank
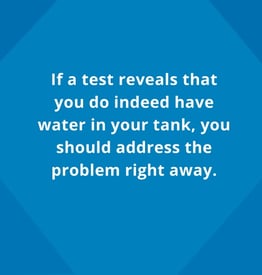 If a test reveals that you do indeed have water in your tank, you should address the problem right away. The most effective way to get water out of your tank depends on the type of tank and the amount of water inside. In general, you should rely on the help of a professional to remove water if there's more than a couple of inches of water at the bottom of your tank. You can often take care of small amounts of water, though, on your own. You will also need to bring in professional help if water was able to get in due to an issue with your tank, such as a broken seal or perforation. This is especially important since openings that allow in water can also let out oil. Let's look at a few ways you can remove water from your heating oil tank:
- Drain It: If you have a metal oil tank, check for a sludge valve on the bottom of the tank. You can drain water out by opening this valve. You may not get every drop out this way, but it's at least a good place to start. Water that drains out will contain some oil as well, so you must be careful with how you collect and dispose of it. Don't allow it to spill out on the ground, and certainly don't put it down the drain. Your local council should be able to direct you to the proper disposal location where the contaminated water will likely go into a tank designated for waste oil.
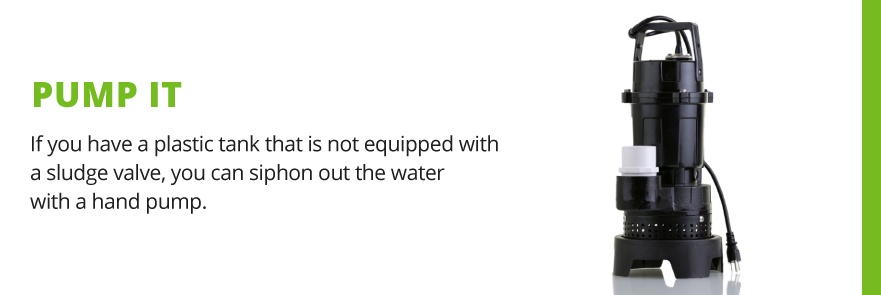
- Pump It: If you have a plastic tank that is not equipped with a sludge valve, you can siphon out the water with a hand pump. You may be able to handle small amounts on your own, but you should rely on a professional to pump out large amounts. Again, this method may not get all of the water out, but it should greatly reduce it.
- Absorb It: For smaller amounts of water, you can take advantage of substances that naturally absorb water to extract it from your oil tank. There a couple of different ways you can do this.
- Alcohol-Based Dispersant: One way you can absorb water is with a water dispersant additive. These oil tank additives are typically alcohol-based and naturally absorb water. To use it, you simply pour the additive into your tank and let it go to work. Some additives are not only designed to absorb water but to break up sludge as well. If you use one of these additives, be aware that it may cause your oil filter to clog. This can happen when the debris that gets broken up moves into your oil lines.
- Water-Absorbent Sock: Another way you can soak up water is by inserting an absorbent material into your tank for a prescribed amount of time and then removing it. These devices differ somewhat in shape and size, but they are typically made of cloth and are chemically treated to be extra-absorbent. Some water-absorbent socks are capable of soaking up around two cups of water. If you have more water than that, but not so much that you should be pumping it out instead, you may need to purchase more than one sock or find one that is reusable. You can tell if you saturate one completely, which would let you know you need to either reuse it or insert another one in order to finish the job.
No matter which method you use, you may not be done after just getting the water out of your tank. Once the water has been removed, the boiler feed pipe may need to be flushed and the fuel filters replaced. In most cases, you should call on a professional to do this work.
Potential Damages of Not Removing the Water from the Tank
Water may seem harmless enough, but it can wreak havoc on your heating system. Let's look at a few problems that can arise as the result of having water in your oil furnace or tank:
- Rust: If water is left inside your tank long enough, it can cause corrosion to occur from the inside. Most steel oil tanks that rust do so from the inside out rather than the outside in. This rust can lead to further complications like leaks and an overall decline in your system's efficiency. Your furnace or fuel pump can also suffer damage when your tank is rusty on the inside. The rust, water and oil at the bottom of the tank create a sludge that can contaminate the fuel supply to your furnace.
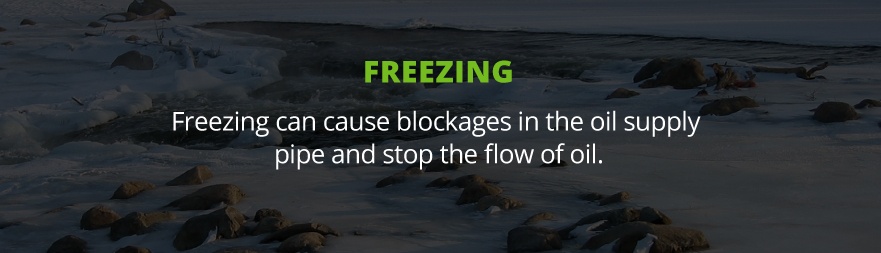
- Freezing: Since oil has a low freezing point, cold temperatures aren't problematic for oil unless they are extreme. However, water freezes at just 32 degrees Fahrenheit. So, when you have water in an outdoor tank, and it's exposed to cold temperatures, it could freeze. Freezing can cause blockages in the oil supply pipe and stop the flow of oil. This can lead to a complete loss of heat, which is a real crisis in the winter when you're trying to keep your home warm.
- Bacteria: Water in your tank creates a breeding ground for bacteria. The bacterial growth turns into a sludge that settles at the base of the tank. The real issue with this bacteria is that it releases acid that can cause corrosion in your tank, fuel lines, burners and filter. This corrosion can cause leaks and other serious problems that can shut your system down.
How to Prevent Water From Getting in Your Oil Tank
Once you've taken care of your current water problem, you should consider taking steps to prevent the same problem from occurring again. Let's discuss nine steps you can take to keep your heating oil system up and running while defending against the damaging effects of water in your tank.

- Close Lids on Your Tank: This one may seem obvious, but it's important that you are careful to make sure the lid or filler cap on outdoor tanks are not open or even loose. Keeping these openings to your tank properly closed off prevents rainwater from getting inside.
- Give Your Tank a Once-Over: Make a habit of visually checking your tank yourself on a regular basis. At the least, look for evidence of oil leaking out of the tank. You should also look for signs of aging like light rust or paint chips as well as more serious issues like heavy rust, scaling or perforations. Perforations pose an immediate problem, and heavy rust and scaling indicate that the metal is thinning. If you have an underground tank, keep an eye on its surroundings. Wilting plants suggest that there may be an oil leak due to a perforation in your tank.
- Have Your Tank Inspected: In addition to your more frequent self-checks, you should have your tank thoroughly inspected at least once annually by an experienced technician. This check should take place before cold weather sets in to ensure your heating system is in good working order and is ready to keep your home warm throughout the cold season.
- Test Your Tank: Since catching water in your tank early can save your tank from numerous complications and can save you from excessive expenses to repair or replace your damaged tank, it's smart to check for water regularly. Using a water-finding paste to conduct routine checks will give you peace of mind when you see that your tank is free of water or will alert you to the issue if there ever is water. For buried outdoor tanks, you may also want to test for soil contamination. Oil in the ground surrounding your tank indicates a leak, which is an environmental hazard and can let groundwater into your tank, contaminating the oil inside. This is not a rare problem — according to the EPA, over half of regulated underground tanks are leaking.
- Absorb Water From Your Tank: Another way you can be sure to stay on top of any water issues is by keeping a water-absorbent sock in your tank at all times. Check the manufacturer's directions to see how long you can leave it, but it can likely be left for a few months before needing to be changed. When you take it out, you can tell by looking at the sock whether it soaked up water, so this can also serve as an ongoing test. Be sure to dispose of these socks carefully, since they will be contaminated with oil. Keeping water-absorbent socks in your oil tank ensures that water doesn't have an opportunity to settle at the bottom of your tank, which protects your tank from water-related damage.
- Modify Your Tank's Temperature: Since condensation is caused by temperature differences between the interior of a tank and the outside air, you can take some steps to reduce this issue. Generally, outdoor tanks experience less condensation if they are placed in the shade rather than in the sun. This is relevant information to consider when picking a place for your outdoor storage tank. If your tank's location is already set, you may want to paint your tank with reflective aluminum paint to help it reflect the sun's rays. You can also build a structure around your tank to shade it in the summertime and to serve as a heated enclosure during the winter. Keeping your tank heated in the winter will keep your oil from gelling and any water inside from freezing.
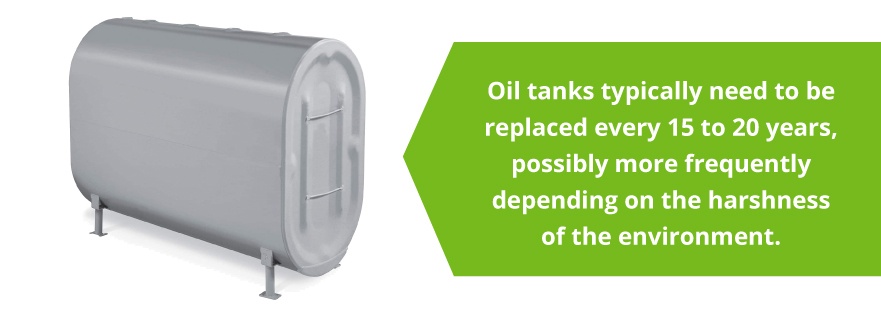
- Replace Your Tank: If your tank is showing signs of wear and tear, either due to the corrosive effects of water or simply age and use, it may be time to replace it. Oil tanks typically need to be replaced every 15 to 20 years, possibly more frequently depending on the harshness of the environment. When moving into a new home with an oil heating system, you should inquire about the age of the oil tank. Even if your tank is relatively young, if you experience an ongoing problem with water that is otherwise unpreventable, you should replace your tank.
- Clean Your Tank: Having your tank professionally cleaned out periodically helps to eliminate water and bacteria-ridden sludge from your tank. This is not a job you can do on your own since it involves pumping out the whole tank. Instead, call on your oil supplier to give your tank a thorough clean. They will likely also pour alcohol-base additives into your tank for further protection. Experts recommend having your tank cleaned once every five years at the least.
- Keep Your Tank Filled: Leaving your outdoor heating oil tank at low levels invites condensation to occur inside the tank. This is especially true when outdoor temperatures are fluctuating and the air is humid. For this reason, you should not let your tank sit under-filled for long periods of time. Test your oil levels and get oil delivered to your home before you're close to running out.
As you can see, there are many ways you can help prevent water issues in the future. The main thing is to be aware of what's going on in and around your tank to catch issues early. Taking care of the issue before it has time to get out of hand is key. Remember, water is only able to do serious damage when it is left to accumulate and eventually cause corrosion, freeze or breed bacteria.
Trust Smart Touch Energy for All Your Home's Oil Fuel Needs
In this post, we've discussed how water can get into your oil tank, how to test for it, how to get it out and how to prevent it from happening again. We hope you've found this guide helpful. Properly maintaining your oil furnace is so important.
One thing is for sure — your oil furnace will always need oil. Fortunately, here at Smart Touch Energy, we have streamlined the process of buying heating oil online and have made it more affordable. You can shop for heating oil at any time of the day or week, can pay online and can even track your delivery. A local professional will be there to deliver your oil, and you'll never pay for more than your tank needs at the time. This guarantee along with our prices, which are as low as $0.40 under the EIA average, will save you a great deal of money — not to mention hassle — on your energy needs. There are no contracts, and you have the flexibility to schedule regular deliveries or to order your heating oil on an as-needed basis.
We currently serve customers in Connecticut, Delaware, Maine, Massachusetts, New Hampshire, New Jersey, New York, Rhode Island and parts of Maryland and Pennsylvania. In some service areas, we offer inspections and preventative maintenance from our qualified technicians. As we've discussed, having a professional check your oil furnace for issues and providing any necessary maintenance is an important step in making sure you don't run into unexpected problems.
Whatever your energy needs, you can count on Smart Touch Energy to save you time and money, all while giving you the peace of mind that your heating oil system will keep your family warm when you need it. Contact us today to learn more.
