

Heating is a significant undertaking in most homes. Heating costs more and consumes more energy than any other household system, generally accounting for around 42% of a home's utility bill. You need your system to run efficiently to give you the most value for your investment.
- What Is a Heating Oil Filter?
- What Are the Benefits of Changing Your Heating Oil Filter?
- How Often Should You Change Your Heating Oil Filter?
- How Can You Tell When Your Heating Oil Filter Needs to Be Replaced?
- How to Change Your Heating Oil Filter
- Tips for Changing Your Heating Oil Filter
- Partner With Smart Touch Energy for Your Heating Oil Needs
If your home uses heating oil, as many homes in the Northeast do, regular filter changes should be part of your fall maintenance checklist for your heating system. The guide below will discuss the benefits of changing your heating oil filter, let you know how you can tell when a filter change is necessary and walk you through how to replace an oil tank filter yourself.
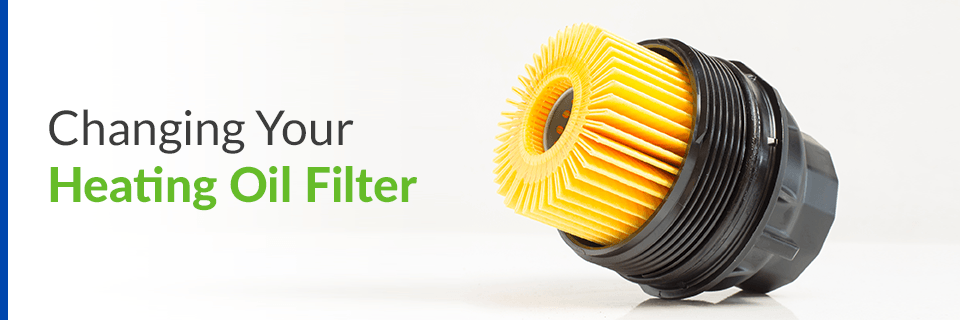
What Is a Heating Oil Filter?
What is a heating oil filter, and what does it do?
Your heating oil filter is typically a cartridge filter on your furnace, water heater or oil-fired boiler. The filter is enclosed in a canister and typically sits between the oil burner and the incoming oil line to filter oil before it reaches the heating system.
The heating oil filter prevents dirt and moisture from seeping into the fuel system. It keeps dirt, water and oil from getting into the fuel nozzle and pump and gumming these parts up so they can't work properly. When the fuel nozzle and pump become clogged, the boiler will lock out — that is, it will shut down to prevent further damage. A clean, functional heating oil filter helps prevent lockouts from happening.

What Are the Benefits of Changing Your Heating Oil Filter?
Changing your heating oil filter requires modest time and energy expenditures, and it can have enormous benefits for your home and budget. Here are a few of the advantages of changing your heating oil filter regularly:
- Improving furnace reliability: A furnace or boiler cannot do its job if it is full of oil and debris. With a dirty filter, your heating system will struggle to warm your home. Or it may break down entirely, leaving your household without heat during the critical winter months.
- Maximizing furnace efficiency: A clean heating oil filter makes your heating system much more efficient. It allows more oil into the furnace or boiler, and it minimizes clogs and debris buildup so oil can flow more smoothly. According to the U.S. Department of Energy, a furnace that uses heating oil at 56% efficiency in a standard cold-weather climate wastes 2.5 tons of carbon dioxide a year compared with a furnace operating at 90% efficiency. Having a clean filter and efficient furnace helps you do your part for the environment.
- Extending furnace life span: Regular oil filter changes help your furnace last longer. They keep its sensitive internal components from becoming clogged or breaking down under the strain of inefficient use.
- Saving money: An inefficient furnace can send your utility bills skyrocketing. As your furnace runs continually, trying and failing to heat your home, it consumes more electricity and costs you more money.
How Often Should You Change Your Heating Oil Filter?
Changing your heating oil filter once or twice a year is usually ideal. You'll want to change the filter right before the start of the winter heating season. You may also want to change it halfway through, especially if debris tends to clog the oil filter and canister.
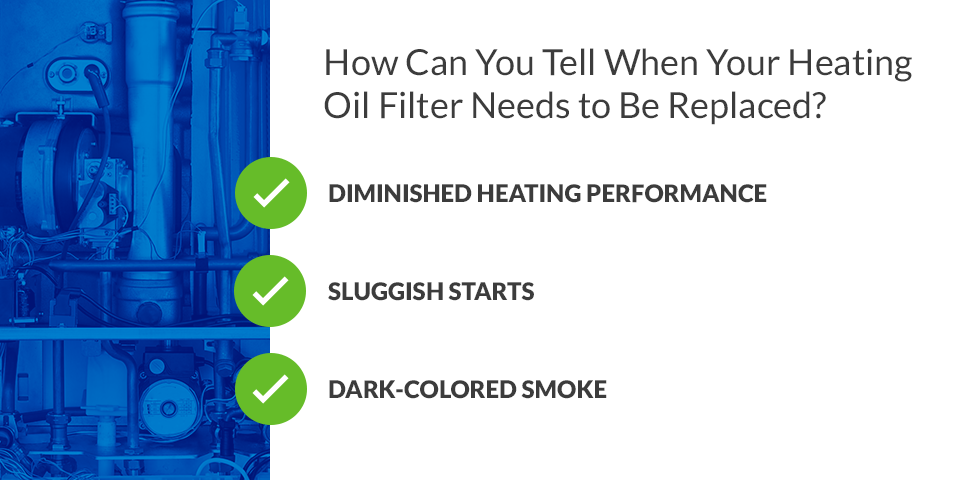
How Can You Tell When Your Heating Oil Filter Needs to Be Replaced?
To tell when your oil filter needs replacement, keep an eye out for these telltale signs:
- Diminished heating performance: If your heating system isn't working as well as it used to, especially if it keeps turning itself off, a dirty filter is a likely culprit. The filter itself may have become clogged, or it may be admitting debris that gums up your heating system's components and makes them much less effective.
- Sluggish starts: If your oil-fired heating system stalls when you turn it on, or if it makes rumbling noises upon startup, these are likely signs that the oil filter is clogged and is not allowing enough oil through to the system.
- Dark-colored smoke: If you notice darker smoke than usual rising from your chimney, your oil filter may be allowing water into your heating system. The presence of water is a sign that your oil filter is too full of moisture and debris to trap any more pollutants.
How to Change Your Heating Oil Filter
To change your heating oil filter, follow this sequence of steps carefully:
1. Turn Off the Power
The first step in the process is to turn off power to the furnace, boiler or water heater. Turning off the power makes maintenance much safer for you by reducing the risk of electric shock.
2. Put Down a Pan or Bucket
You'll need a receptacle to catch oil drips while you work. A flat pan is convenient. You can also use a bucket if space permits. These implements make draining the filter straightforward and safe by preventing oil contamination in your home.
3. Turn the Oil Shut-Off Valve
The next step is to locate the heating oil tank and then find the oil shut-off valve. You will need to shut off the valve to keep oil from pouring out when you open the filter cartridge. If this valve is also the fire safety shut-off valve, it will contain a spring-loaded fusible component that closes the valve if a fire occurs. These valves typically operate in the opposite direction from conventional valves — turning them clockwise opens them, and turning them counterclockwise closes them.
4. Take Out the Canister Base
Next, remove the oil filter canister's base. If the canister has a central bolt, loosen it until it comes off. Then carefully lift out the base. If the canister lacks a central bolt, you can unscrew the canister base from the top. As you loosen the necessary parts, take care not to let the base of the canister fall to the ground and spill.
5. Take Out or Clean the Spent Cartridge
At this point, you can remove the used oil filter cartridge, along with its used gaskets, and set it aside. Because it contains dirt and oil, you'll need to enclose it quickly — consider having a plastic bag on hand for disposal. Your heating system may also have a permanent filter instead of a disposable one. In this case, instead of removing the used cartridge, clean the permanent filter according to the manufacturer's instructions.
6. Wipe Out the Filter Canister
Installing a clean, new filter in a dirty canister defeats its purpose. Before putting in a new filter, wipe out the canister with a cloth to remove any dirt, debris and oil from the sides and bottom. You should also check for water seepage — often evidenced by a red sludge — in the filter canister.
7. Clean the Pump Strainer
Not all heating systems contain pump strainers, but some of them do. If yours does, you'll want to clean it at this stage. To clean the pump strainer, you'll first need to unbolt the cover of its housing. Then you can scrub the strainer with a small brush or toothbrush — you may want to soak it in kerosene for a few minutes first to loosen any caked-on particles. You should also inspect the strainer for damage and make a plan to replace it if necessary.
8. Put In the New Cartridge
At this point, you can install the new oil tank filter cartridge in the canister. Position it the same way you found the old cartridge. The filter cartridge typically comes with a few gaskets to create the necessary seals. When you put in the new cartridge, place the new gaskets as well. If you have a permanent filter instead of a disposable one, you can skip this step.
9. Put the Canister Back Together
Next, you'll need to reassemble the heating oil filter canister. Slide the canister base under the canister lid and into the correct position, keeping the filter cartridge steady and centered as you do so.
10. Replace the Mounting Bolt
Once the two pieces of the oil filter canister are back together, replace the bolt at the top of the canister. Tighten it securely and be careful not to apply so much pressure that you strip the threads. If the canister has no bolt, make sure the base is screwed in as tightly as it will go.
11. Reopen the Oil Supply Valve
Once you've finished with the canister reassembly, you can turn the oil flow back on using the same valve you used to turn it off. You'll need to do this to bleed air from the canister and the filter correctly.
12. Turn the Power Back On
Once all the above steps are complete, you can safely turn the power to your heating appliance back on. You'll want to perform this step immediately so you can run the oil burner and evaluate its performance.
13. Bleed Air
The process of disassembling and reassembling the filter canister admits air into its body, and the filter itself contains trapped air as well. For the safe and proper functioning of your oil burner, you'll need to bleed that air out by loosening the air bleeder screw.
14. Run Your Oil Burner
Allow your oil burner to run for a while so you can make sure it is still functioning as it should. Note whether it starts and stops correctly — failure to do so is an indication that too little oil is getting through the filter.
15. Inspect for Leaks
As the oil burner runs, inspect it carefully to ensure the filter change has not introduced any leaks into the system. In particular, you'll want to check the center bolt, air bleeder screw, canister top and fittings surrounding the filter canister. Remember that an oil leak is also an air leak — as oil leaks out of the pipes or filter canister, air is leaking in. Air in the heating system can increase the risk of heat loss, puffbacks — small explosions — and fires.
16. Dispose of the Spent Filter and Oil
Once all the other tasks are complete, the last step is to dispose of the filter and any waste oil. One easy option is to seal the filter in a plastic bag and throw it away. If you collected oil in your drip pan or bucket and the oil appears clean, you can pour it back into the oil tank via the piping.
If the oil contains debris or sludge, dispose of it instead. You may need to contact your local waste authorities to determine the best way to dispose of used heating oil in your area.
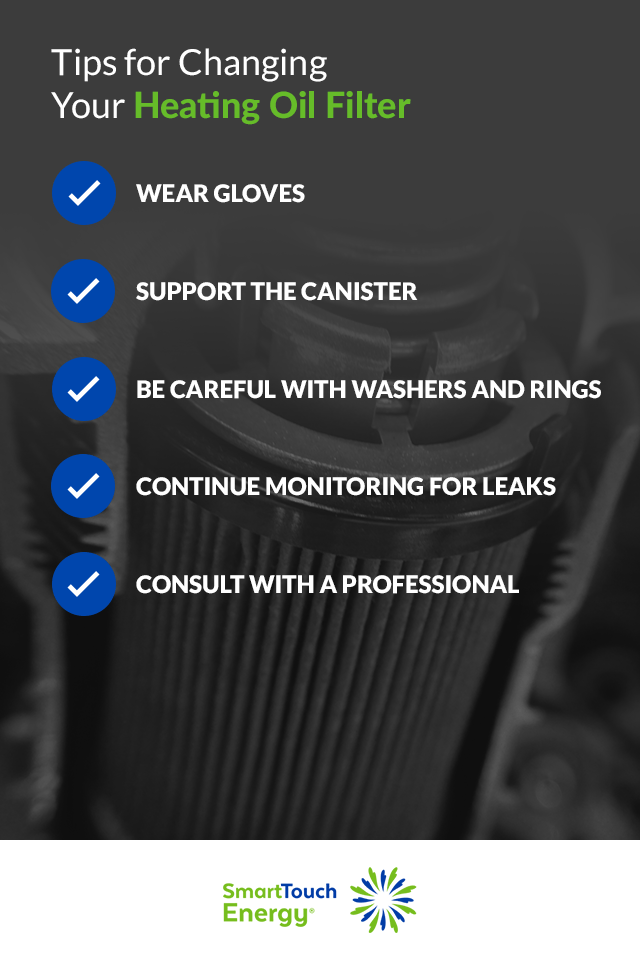
Tips for Changing Your Heating Oil Filter
Here are a few tips to implement to make following the steps outlined above safer and more convenient:
- Wear gloves: Heating oil can irritate your skin and stain your clothes, and you also don't want your skin to absorb large amounts of oil. Wearing gloves during a filter change gives you valuable protection.
- Support the canister: As you disassemble and reassemble the canister, support it with your hand, especially if it has minimal piping support. Loosening or tightening the parts without providing adequate support may cause the pipes to twist, crack and leak.
- Be careful with washers and rings: Oil filter canisters generally contain a washer, which seals the canister's bolt, and an O-ring that seals the space between the canister lid and base. It's easy to lose track of these small parts as you're changing the filter. Put them aside in a designated place like a small cup so you can locate them quickly when you're done. Your new filter may also come with a new O-ring, in which case you can dispose of the old one.
- Continue monitoring for leaks: A day or two after you've completed the filter change, continue checking to see whether your oil tank filter is leaking. Not all leaks show up right away, so keeping an eye out for slow-developing ones can help you catch small issues before they become bigger.
- Consult with a professional: Though you can change your heating oil filter yourself — and following a guide like this one will make the task much easier — doing so comes with a small amount of hazard. An untrained person changing an oil filter could endanger people and pets by causing oil leaks, fires, burns or permanent damage to the heating system. Letting a heating professional change the filter puts the job into the hands of a qualified expert and reduces these risks.

Partner With Smart Touch Energy for Your Heating Oil Needs
When you need heating oil or related services like heating oil tank filter replacement, let Smart Touch Energy help. You can choose one-time or automatic heating oil delivery, and we are happy to provide emergency services if you run out of heating oil unexpectedly.
We also provide maintenance services for your oil burner, including oil filter changes, to ensure everything functions correctly. Our unmatched commitment to customer service means our friendly, knowledgeable technicians are always ready to answer questions or help you get the comfortable, efficient heating you need.
Contact us today to schedule service or learn more.
Sources:
- https://www.energy.gov/energysaver/heat-and-cool/home-heating-systems
- https://blog.smarttouchenergy.com/fall-furnace-maintenance
- https://www.energy.gov/energysaver/home-heating-systems/furnaces-and-boilers
- https://www.dep.pa.gov/Business/Land/Waste/SolidWaste/HazardousWaste/Household/Pages/HHW-Collection-Programs.aspx
- https://www.smarttouchenergy.com/services/heating-oil
- https://www.smarttouchenergy.com/services/oil-burner-cleaning-service
- https://www.smarttouchenergy.com/contact-us
